We will be making a colorful canvas design!
Supplies:
-Canvas (no specific size)
-Modge Podge
-A paintbrush (or your finger)
-Acrylic paint
-Printed out picture or colorful paper and stencils
-Scissors
-Punches (optional)
The first thing you want to do is unwrap your canvas, and paint the entire thing with your acrylic paint and a paintbrush. You can paint a design, or a solid color, or anything else that you want. It depends on what you want your canvas to look like, so consider the end result beforehand! I'll be painting mine a solid yellow color for this tutorial.
*Make sure your paint is even
*Be sure to get the sides of your canvas
*Wash your brush after you finish painting
Let's let our canvas dry for an hour or so and then move on to the next step!
Step 2:
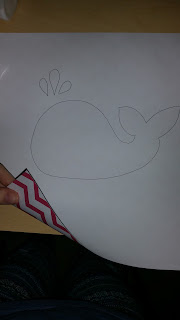
Now that we've painted our canvas, our next step is to create our design. You can either print out a picture and cut it out, or you can draw your own on a colorful sheet of paper. I picked a pink and white chevron piece of paper and decided to draw a whale. I drew it on the back of my paper with pen. If you know you might mess up, I'd recommend using a pencil.

After you've finished drawing, you'll want to cut out your design. At this point I decided to also use a heart stamp to give my whale an eye. This part is optional because you have the choice to just cut the eye, draw the eye, or use a stamp.
Step 3:
Now that we have our design cut out, we need to add the modge podge to get it to stick. Let's take our paintbrush and cover the entire back of the DESIGN. The we want to also put modge podge on the whole CANVAS. After doing that we can lay our design down on the canvas and reapply modge podge over the DESIGN and CANVAS together.
*Smooth out your design with a card if you don't want wrinkles
*Go slowly for optimum results
*You can apply a little at a time instead of on everything at once (I tend to work too fast.)
Step 4: Let the Modge Podge dry and fix any areas that didn't stick. Enjoy your work! Hang it up, give it to someone, or just keep it for your room! This is a quick and fun little craft to brighten up any space! I put it in my little sisters room!
Thanks for reading! Share if you liked it!


No comments:
Post a Comment